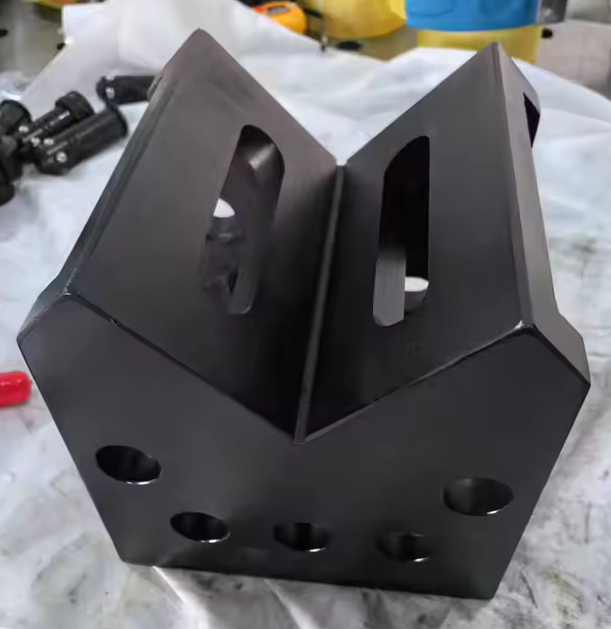
Building a DIY fabrication table is a strategic move for any workshop aiming to enhance precision and workflow efficiency. A robust workbench provides the stable foundation necessary for accurate welding, assembly, and machining tasks. While traditional steel tables offer basic support, modern fabrication demands modularity and high-precision positioning. This guide details how to construct a strong, durable workbench while integrating advanced modular fixture concepts used in professional manufacturing environments.
Why Build a Strong DIY Fabrication Table?
A fabrication table is not merely a surface; it is the primary reference plane for your projects. Inconsistent or weak tables lead to distorted welds, misaligned assemblies, and increased rework time. For hobbyists and professionals alike, the core requirement is rigidity. Without sufficient mass and structural integrity, the table will flex under load, compromising the accuracy of your work.
Moreover, the evolution of metalworking has shifted from static benches to dynamic, modular systems. In industries like aerospace and automotive manufacturing, speed and repeatability are critical. This is where the concept of a flexible modular fixture becomes relevant. By understanding how professional 2D and 3D flexible welding platforms operate, you can incorporate similar principles into your DIY build, such as standardized hole patterns for clamping and modular accessory integration.
Key Benefits of a Custom-Built Workbench
- Custom Dimensions: Tailor the height and surface area to your specific workspace and ergonomic needs.
- Material Selection: Choose high-grade steel or cast iron components that match the thermal and mechanical demands of your projects.
- Modularity Potential: Design the table to accept standard clamping tools, angle gauges, and supports, mimicking professional setups.
- Cost Efficiency: Build a high-performance station at a fraction of the cost of pre-engineered industrial solutions, while maintaining professional-grade capabilities.
Core Components of a High-Precision Workbench
To build a table that rivals professional equipment, you must focus on three main elements: the frame, the top surface, and the leveling system. Each component plays a vital role in ensuring the table remains flat and stable over time.
The Frame: Structural Integrity
The frame supports the entire structure. For a heavy-duty fabrication table, rectangular steel tubing (such as 2×4 or 3×3 inch profiles) is ideal. Welded joints should be full-penetration welds to prevent movement. Cross-bracing is essential to resist torsional forces during heavy clamping or hammering.
In professional settings, companies like Botou Haijun Metal Products Co., Ltd. emphasize the importance of rigid base structures for their 2D and 3D flexible welding platforms. These platforms are designed to withstand significant lateral and vertical loads without deformation. When building your DIY table, consider incorporating similar reinforcement strategies, such as gusset plates at corner joints, to enhance longevity.
The Top Surface: Flatness and Durability
The tabletop is the most critical component. It must be perfectly flat to serve as a reliable reference. Common materials include:
- Mild Steel Plate: Affordable and easy to weld, but prone to warping if not properly supported.
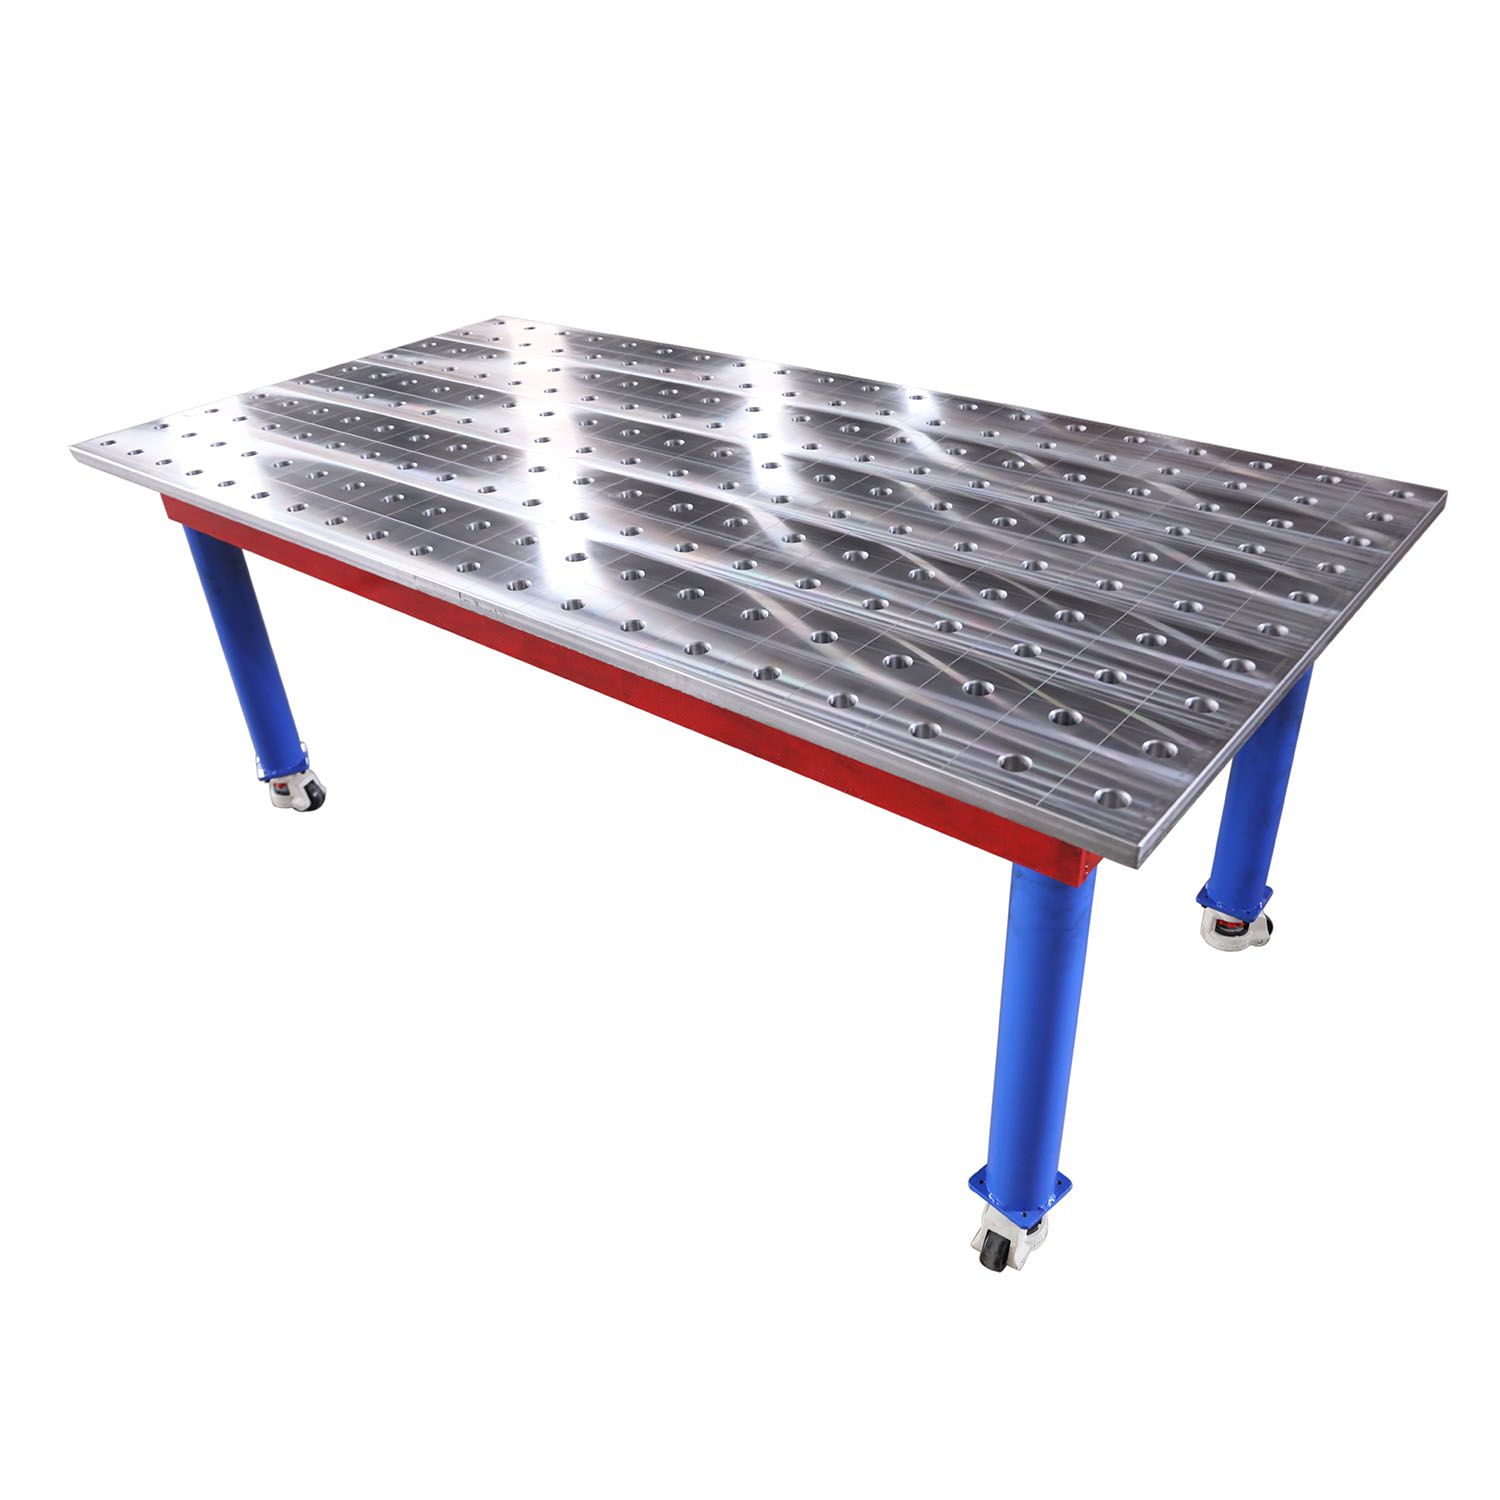
- Cast Iron: Offers superior damping properties and stability. Professional cast iron 3D welding platforms, such as those manufactured by Haijun Metal, provide exceptional durability and resistance to thermal distortion.
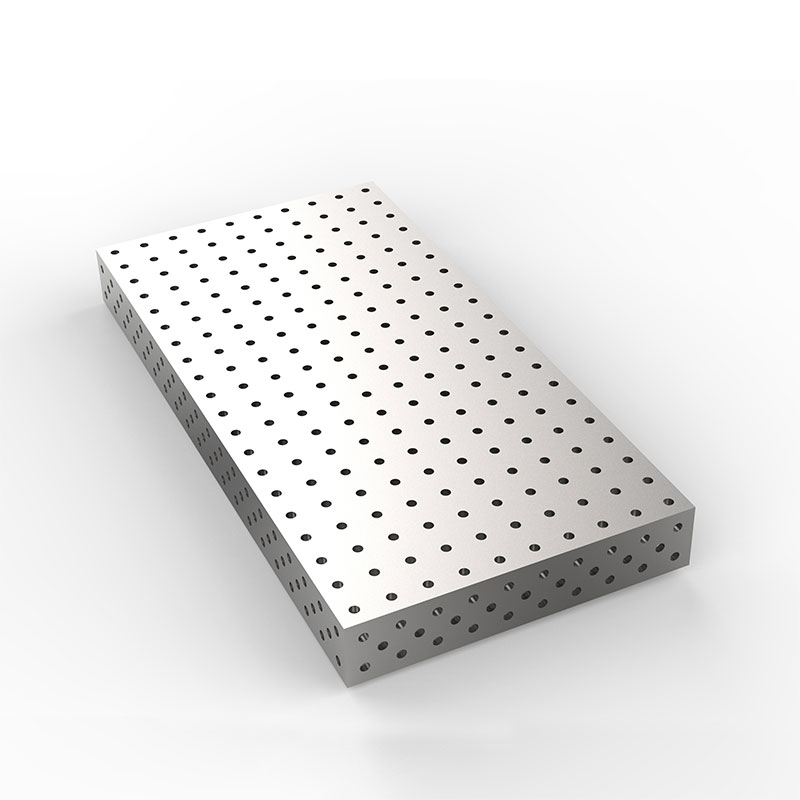
- Perforated Steel: Allows for versatile clamping options using pins and stops, facilitating rapid setup changes.
For a DIY approach, a thick steel plate (minimum 1/2 inch) welded to a rigid grid of square tubing underneath provides an excellent balance of cost and performance. Ensure the top is stress-relieved after welding to minimize future warping.
Leveling Feet: Adapting to Floor Irregularities
No floor is perfectly level. Heavy-duty leveling feet allow you to stabilize the table regardless of floor conditions. Look for feet with a large contact patch to distribute weight evenly and prevent sinking into concrete or epoxy coatings. Adjustable height mechanisms should be locked securely to prevent shifting during operation.
Step-by-Step Guide: How to Build a Strong Workbench
Follow this structured process to construct a fabrication table that meets professional standards. This method prioritizes flatness and modularity, drawing inspiration from industrial best practices.
Step 1: Design and Material Preparation
Begin by sketching your design. Determine the dimensions based on your available space and typical project sizes. Standard heights range from 34 to 38 inches. Gather your materials:
- Rectangular steel tubing for the frame.
- Thick steel plate or cast iron surface plate for the top.
- Leveling feet capable of supporting the total weight.
- Welding supplies and grinding tools.
Cut all materials to size. Ensure cuts are square to facilitate accurate assembly. If you plan to integrate modular accessories, consider drilling a pattern of holes in the tabletop. Standard hole diameters (e.g., 16mm or 28mm) allow compatibility with a wide range of clamping tools.
Step 2: Assemble the Base Frame
Lay out the frame components on a flat surface. Use clamps to hold the pieces in place. Check for squareness using a precision square or diagonal measurements. Tack weld the corners first, then re-check squareness before completing the welds.
Add cross-braces or internal supports every 12 to 18 inches. This grid will support the tabletop and prevent sagging. Weld all joints thoroughly. Grind welds smooth if necessary, especially where the top will sit.
Step 3: Attach the Tabletop
Place the steel plate or cast iron surface onto the frame. Ensure it sits flush against all support points. If using a steel plate, tack weld it to the frame at regular intervals. Allow the metal to cool between tacks to reduce heat buildup and warping.
For enhanced modularity, many professionals opt for surfaces compatible with flexible modular fixtures. These systems utilize precise hole patterns to anchor clamps and stops. If you are drilling your own pattern, use a CNC machine or a high-precision drill press to ensure hole alignment. Misaligned holes can render modular clamps ineffective.
Step 4: Install Leveling Feet and Finish
Attach the leveling feet to the bottom of the frame legs. Use heavy-duty bolts and lock nuts to secure them. Place the table in its final location and adjust the feet until the surface is perfectly level in all directions.
Clean the surface thoroughly. Remove any slag, spatter, or rust. Apply a protective coating, such as a clear rust inhibitor or paint, to the frame. Leave the tabletop bare or apply a thin layer of oil to prevent rust, ensuring it remains ready for welding.
Integrating Modular Precision: The Professional Edge
While a basic steel table is functional, integrating modular elements transforms it into a high-efficiency workstation. This is where the expertise of specialized manufacturers becomes invaluable. Botou Haijun Metal Products Co., Ltd. specializes in the research and production of high-precision flexible modular fixtures, offering solutions that can inspire your DIY setup or serve as direct upgrades.
Their core product line includes 2D and 3D flexible welding platforms, renowned for versatility and precision. These platforms are preferred in machining, automotive, and aerospace industries due to their ability to handle complex geometries. By incorporating similar modular components into your DIY table, you gain several advantages:
- Rapid Positioning: Use standardized holes to quickly locate and clamp workpieces.
- Repeatability: Produce identical parts with consistent accuracy.
- Flexibility: Adapt the table for different projects without extensive retooling.
Essential Modular Accessories
To maximize the utility of your fabrication table, consider adding complementary components. Haijun Metal offers a comprehensive range of accessories that integrate seamlessly with modular platforms:
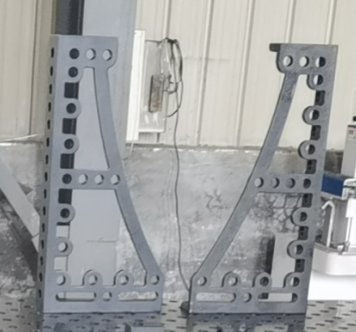
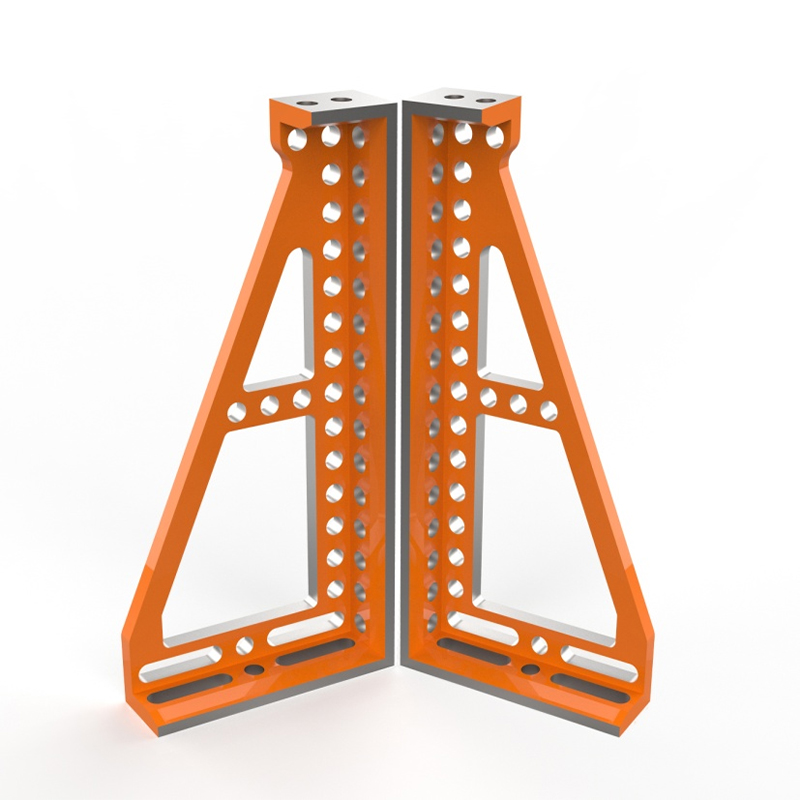
- U-shaped and L-shaped Multi-purpose Square Boxes: These tools provide precise 90-degree references for assembling frames and boxes.
- 200-series Support Angle Irons: Ideal for supporting angled workpieces or creating temporary jigs.
- 0-225° Universal Angle Gauges: Allow for precise angular positioning, essential for complex fabrications.
- Angle Connection Blocks: Facilitate secure connections between modular elements, ensuring stability during welding.
These accessories enable rapid workpiece positioning and clamping, significantly reducing setup time. Whether you are building a custom jig or simply securing a part for welding, these tools enhance the overall capability of your workbench.
Comparison: Traditional vs. Modular-Ready DIY Tables
Understanding the differences between a standard DIY table and one designed for modularity helps in making informed construction decisions.
| Feature | Traditional DIY Table | Modular-Ready DIY Table |
| Surface | Solid steel plate, no holes | Perforated plate with precise hole pattern |
| Clamping | C-clamps, vise grips (slow setup) | Quick-action clamps, pins, stops (fast setup) |
| Accuracy | Dependent on manual measurement | Reference holes ensure repeatable positioning |
| Versatility | Limited to flat or simple shapes | Supports complex 3D assemblies with accessories |
| Upgrade Path | Difficult to modify | Compatible with professional modular systems |
As shown, a modular-ready table offers superior efficiency and precision. By designing your DIY table with these features in mind, you future-proof your workshop and align it with industry standards.
Common Mistakes to Avoid When Building a Workbench
Even experienced builders can make errors that compromise the quality of their fabrication table. Avoid these common pitfalls to ensure a successful build.
Ignoring Thermal Distortion
Welding generates significant heat, which can cause steel to warp. If you weld the tabletop to the frame continuously without allowing cooling time, the surface may bow. Use tack welding and staggered sequences to manage heat input. Alternatively, use mechanical fasteners for the top if welding is not required.
Inadequate Support Under the Top
A thick steel plate will sag if the support grid underneath is too sparse. Ensure that supports are spaced closely enough to prevent deflection under load. A general rule is to have support every 12 inches for heavy-duty applications.
Poor Hole Alignment
If you drill a hole pattern for modular clamps, precision is paramount. Even small deviations can prevent accessories from fitting correctly. Use a template or CNC machining for hole drilling. Professional platforms, like those from Haijun Metal, undergo rigorous quality control to ensure hole accuracy, highlighting the importance of precision in modular systems.
Neglecting Grounding
For welding tables, proper electrical grounding is essential. Ensure the table is grounded to prevent stray arcs and ensure safety. Install a dedicated grounding point on the table frame for easy connection of welding ground clamps.
Maintenance and Longevity Tips
A well-built fabrication table requires minimal maintenance, but regular care extends its life and maintains accuracy.
- Clean After Use: Remove spatter, slag, and debris after each session. Use a chisel or grinder to clean the surface.
- Check Flatness: Periodically verify the flatness of the table using a straight edge or level. Address any warping early.
- Lubricate Moving Parts: If you use adjustable leveling feet or modular clamps, keep them lubricated to prevent seizing.
- Rust Prevention: Apply a light coat of oil or wax to the tabletop when not in use, especially in humid environments.
- Inspect Welds: Check frame welds annually for cracks, especially if the table is subjected to heavy impact or vibration.
FAQ: Frequently Asked Questions About DIY Fabrication Tables
What is the best material for a welding table top?
Mild steel is the most common choice due to its affordability and weldability. However, cast iron offers better stability and damping properties. For high-precision work, a perforated steel top compatible with modular fixtures is ideal.
How thick should the tabletop be?
For general fabrication, a 1/2-inch (12mm) steel plate is sufficient. For heavy-duty industrial applications, 3/4-inch (19mm) or thicker is recommended to prevent warping and provide a solid reference surface.
Can I convert my existing table to a modular system?
Yes, you can drill a hole pattern into an existing steel tabletop. However, ensure the table is rigid and flat before drilling. Using professional accessories, such as those from Botou Haijun Metal Products Co., Ltd., can enhance the functionality of your converted table.
Why are modular welding platforms preferred in aerospace?
Aerospace manufacturing requires extreme precision and repeatability. Modular platforms, with their standardized hole patterns and versatile clamping options, allow for rapid setup and accurate positioning of complex components, reducing production time and errors.
How do I ensure my DIY table is square?
Use the “3-4-5” triangle method or measure diagonals across the frame. If the diagonal measurements are equal, the frame is square. Check squareness again after tack welding and before final welding.
Conclusion: Elevate Your Workshop with Precision
Building a DIY fabrication table is more than a construction project; it is an investment in your craftsmanship. By focusing on rigidity, flatness, and modularity, you create a workspace that supports high-quality results. Integrating principles from professional flexible modular fixtures allows you to achieve industrial-level precision in your own shop.
Whether you are a hobbyist tackling weekend projects or a small business scaling up production, a strong, well-designed workbench is essential. Consider incorporating high-quality modular components, such as the 2D and 3D flexible welding platforms and accessories offered by Botou Haijun Metal Products Co., Ltd., to enhance your table’s capabilities. Their expertise in providing efficient welding and positioning solutions can help you transition from basic fabrication to advanced, precise manufacturing.
Ready to upgrade your workspace? Evaluate your current setup and identify areas where modularity and precision can improve your workflow. Explore professional-grade tools and fixtures to complement your DIY efforts.
For more information on high-precision flexible modular fixtures and metalworking tools, visit our product page to find the perfect solutions for your manufacturing needs.